Craft Tutorials
Easy-to-follow craft projects at home
Branch Weaving
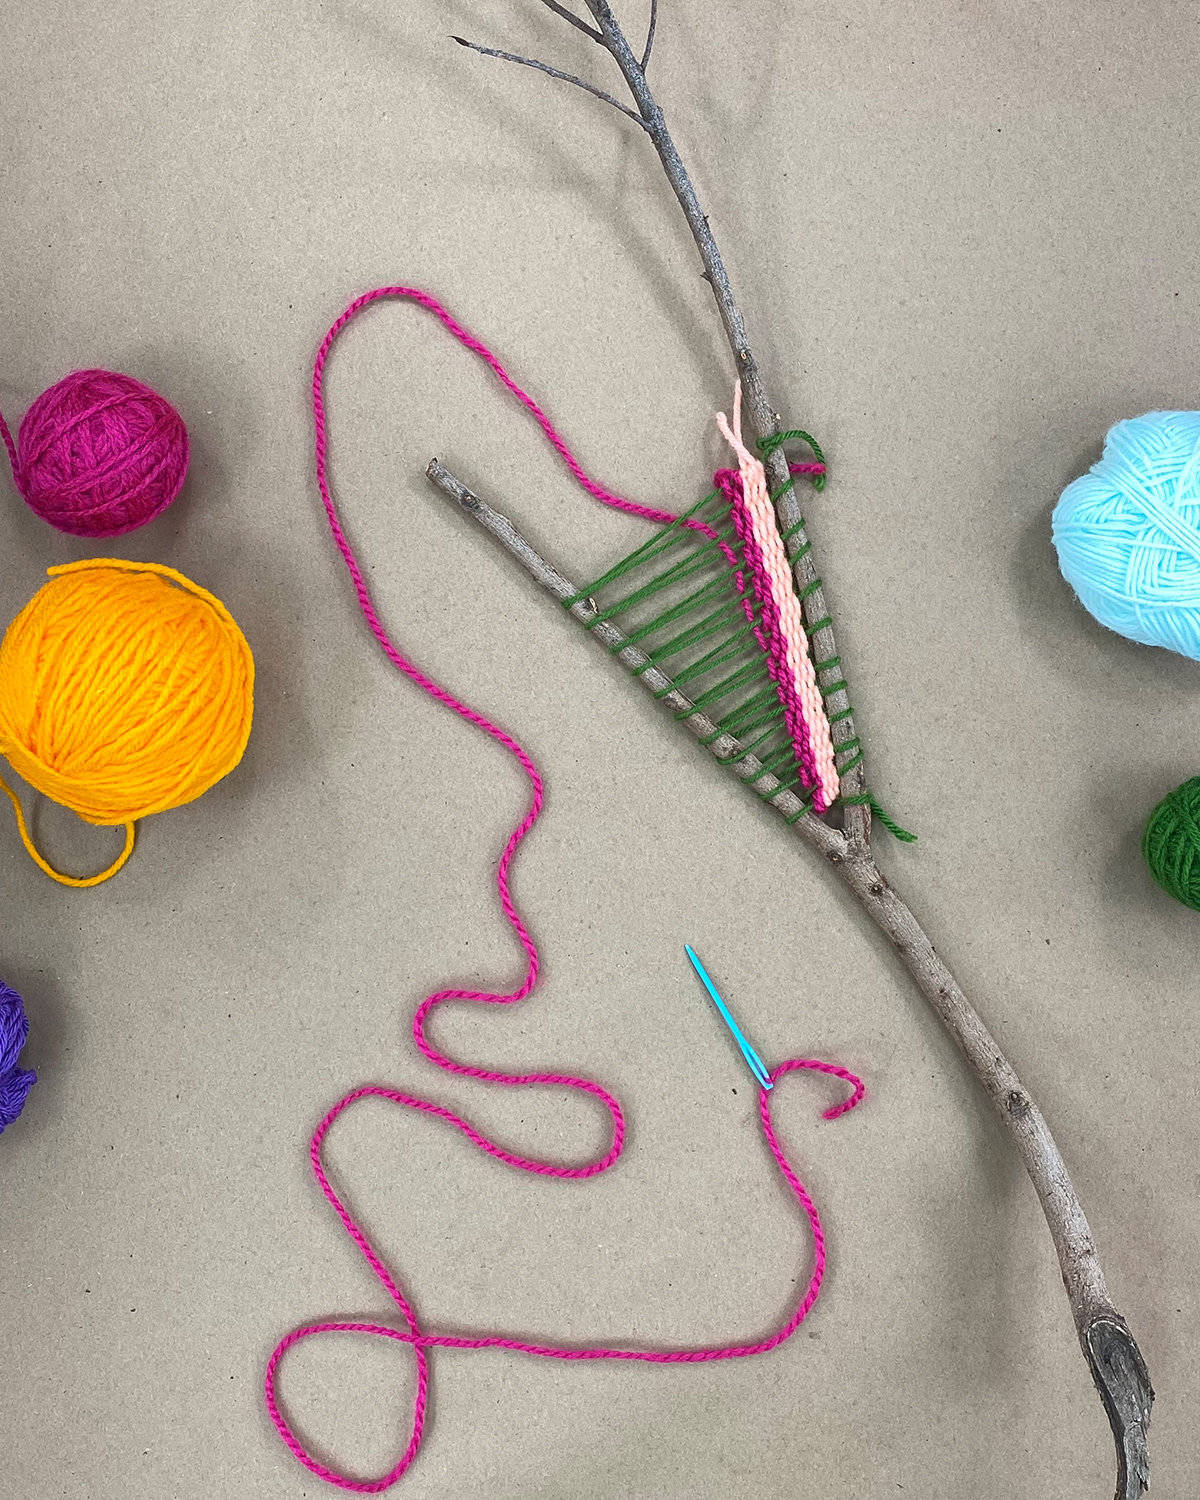
We love incorporating natural materials into our crafts. This ~*Branch Weaving*~ technique - as taught by Mimi Haddon - unites weaving and wood for a perfectly pastoral piece.
Materials
+ 1 large Y-shaped branch
+ Branch Clippers
+ Scissors
+ Yarn
+ Yarn Needle
Steps
1 - Find a branch in a Y shape. Clip away excess twigs until you are left with a sturdy frame.
2 - Cut 2 arms lengths worth of yarn for the warp* and double knot at the inner V
3 - Create your warp* with an alternating zig zag across the branches with .25" space between. Close with a double knot.
4 - Choose your first yarn color for the weft*. Cut an arms length, thread, and tie to the top of the warp*
5 - Weave across the warp* in an alternating over-under pattern. Compress as you go. When you reach the bottom, loop back around and continue to alternate.
6 - Cut and tie to start a new color for a striped design.
* Warp: This the yarn that wraps around the branches. This yarn is stationary and holds tension. Choose a yarn color that you want to be the most consistently visible.
* Weft: This is the yarn that is threaded through the Warp in an alternating over-under pattern. Design your weaving with alternating color, tapered stripes or more complex styles.
Follow along, add in your own twist, and tag @craftcontemporary in your creations.
Printing with Leaves
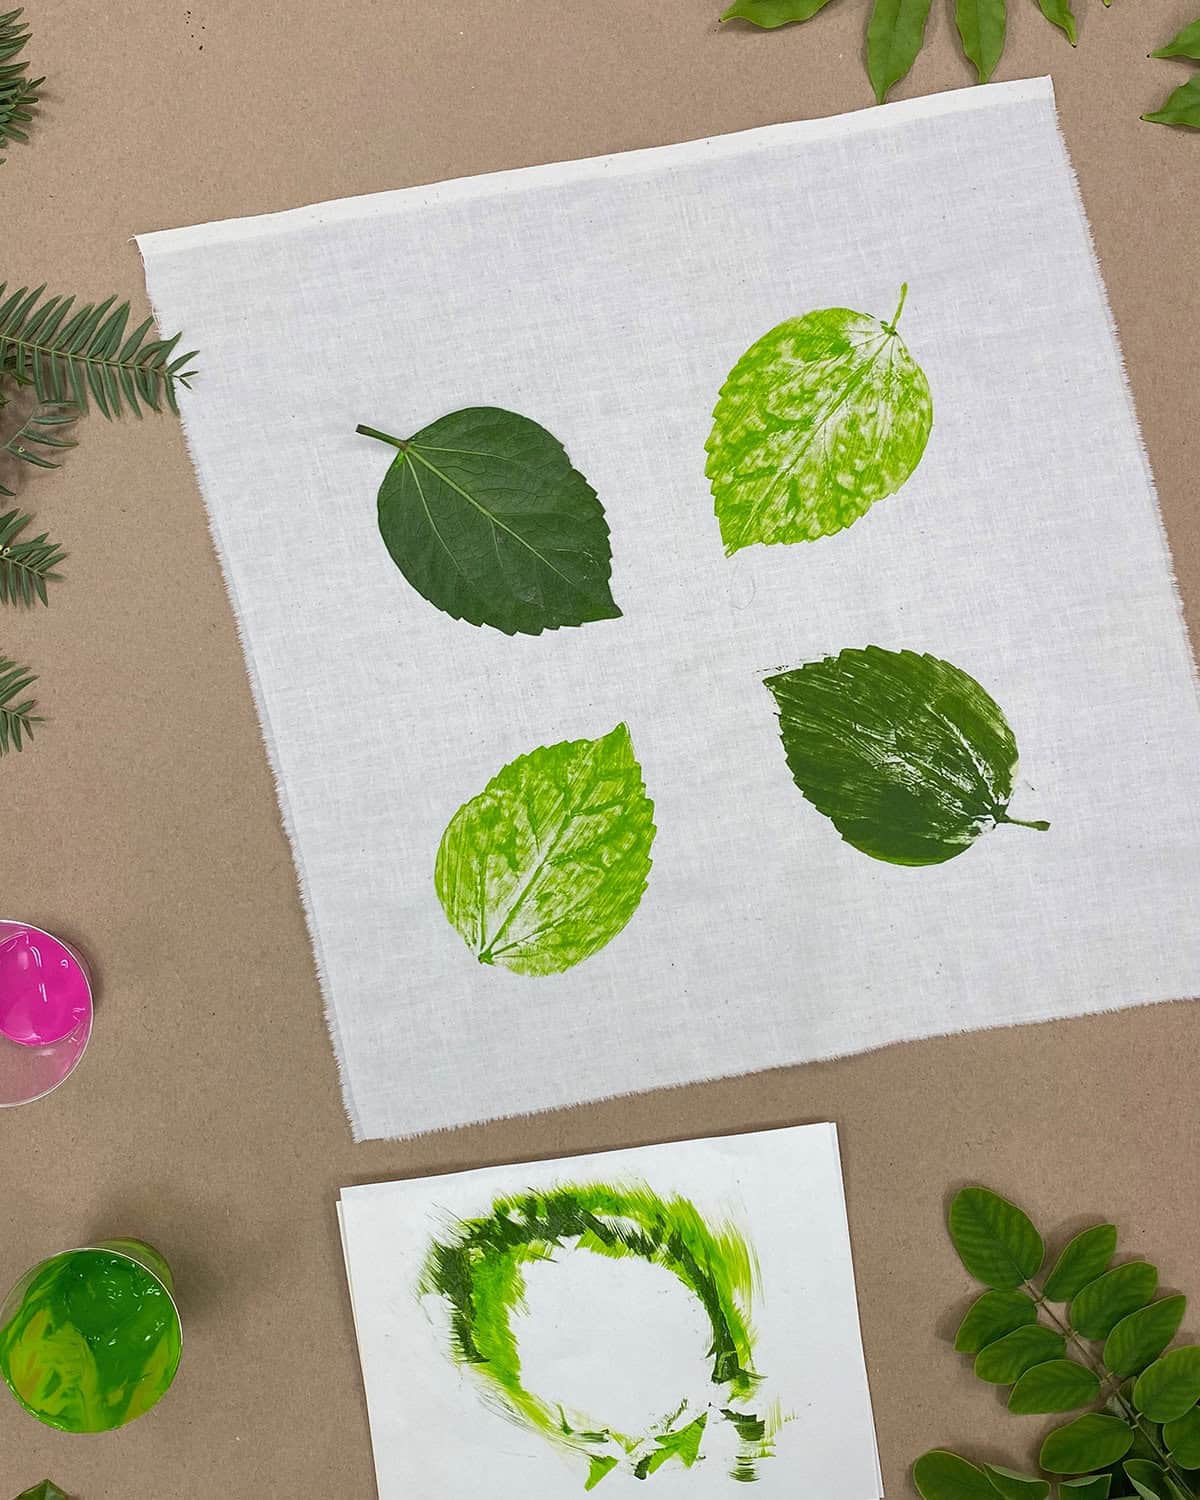
This technique - as taught by Ivan Lopez - is a great way to get started playing with natural print techniques. Gather a variety of fresh leaves and get started ⚘Printing with Leaves⚘.
Materials
+ Fabric
+ Acrylic Paint
+ Foam Brushes
+ Brayer or Rolling Pin
+ Leaves
Steps
1 - Apply a thin, even layer of paint to the top side of a leaf
2 - Place paint-side down on fabric and cover with scratch paper
3 - Roll with brayer, applying even pressure
4 - Peel away leaf to real the imprint
5 - Repeat! Experiment with different types of leaves, layering colors, and controlled chaos
Follow along, add in your own twist, and tag @craftcontemporary in your creations.
No-Sew T-Shirt Mask
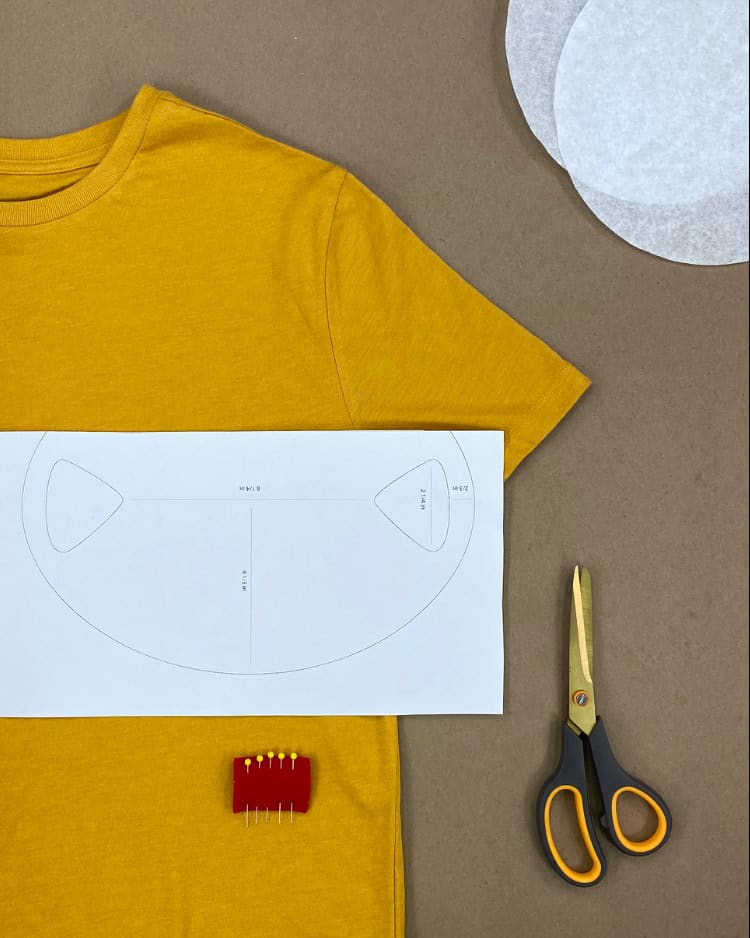
Here's a quick ・:*No-Sew T-Shirt Mask*:・you can whip up in a jiffy. This mask requires a pattern, download below.
Materials
+ Jersey T-Shirt
+ Pattern
+ Coffee Filter
+ Scissors
+ Pins
Steps
1 - Lay patten on shirt from bottom hem. Use this height to make your first cut.
2 - Cut open both side seams, giving yourself a single piece of fabric.
3 - Fold fabric in half and lay pattern along folded edge. Pin into place.
4 - Cut along pattern to create shape.
5 - Add pins to ears and edges, then cut those out.
6 - Remove all pins and pattern.
7 - Unfold fabric and place a folded coffee filter for extra air filtration.
8 - Wear! Twist around ears for a tight hold.
Follow along, add in your own twist, and tag @craftcontemporary in your creations.
No-Sew Pleated Mask
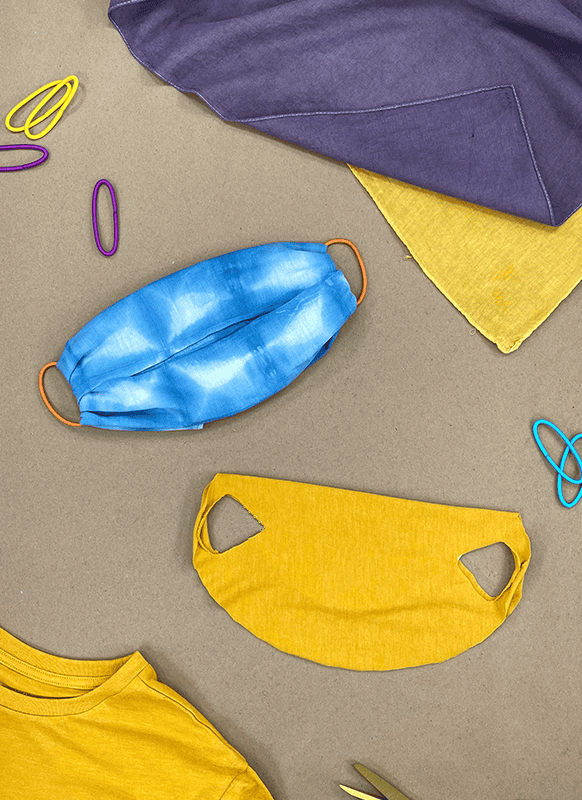
It's good to have a fews masks handy. Laundry day, evening walks, grocery store step & repeat. Here's a quick ・:*No-Sew Pleated Mask*:・ you can whip up any day of the week.
Materials
+ Cotton Fabric (20 x 20 recommended)
+ Hairbands
Steps
1 - Fold the long sides of the fabric to the meet in the center
2 - Flip the fabric and repeat this fold, creating your pleats
3 - Flip the fabric back
4 - Slide each hairband a quarter of the way onto the folded fabric
5 - Slide each hairband a quarter of the way onto the folded fabric
6 - Fold the banded edges into the center, tucking the final fold into the last
7 - Flip and wear!
Follow along, add in your own twist, and tag @craftcontemporary in your creations.
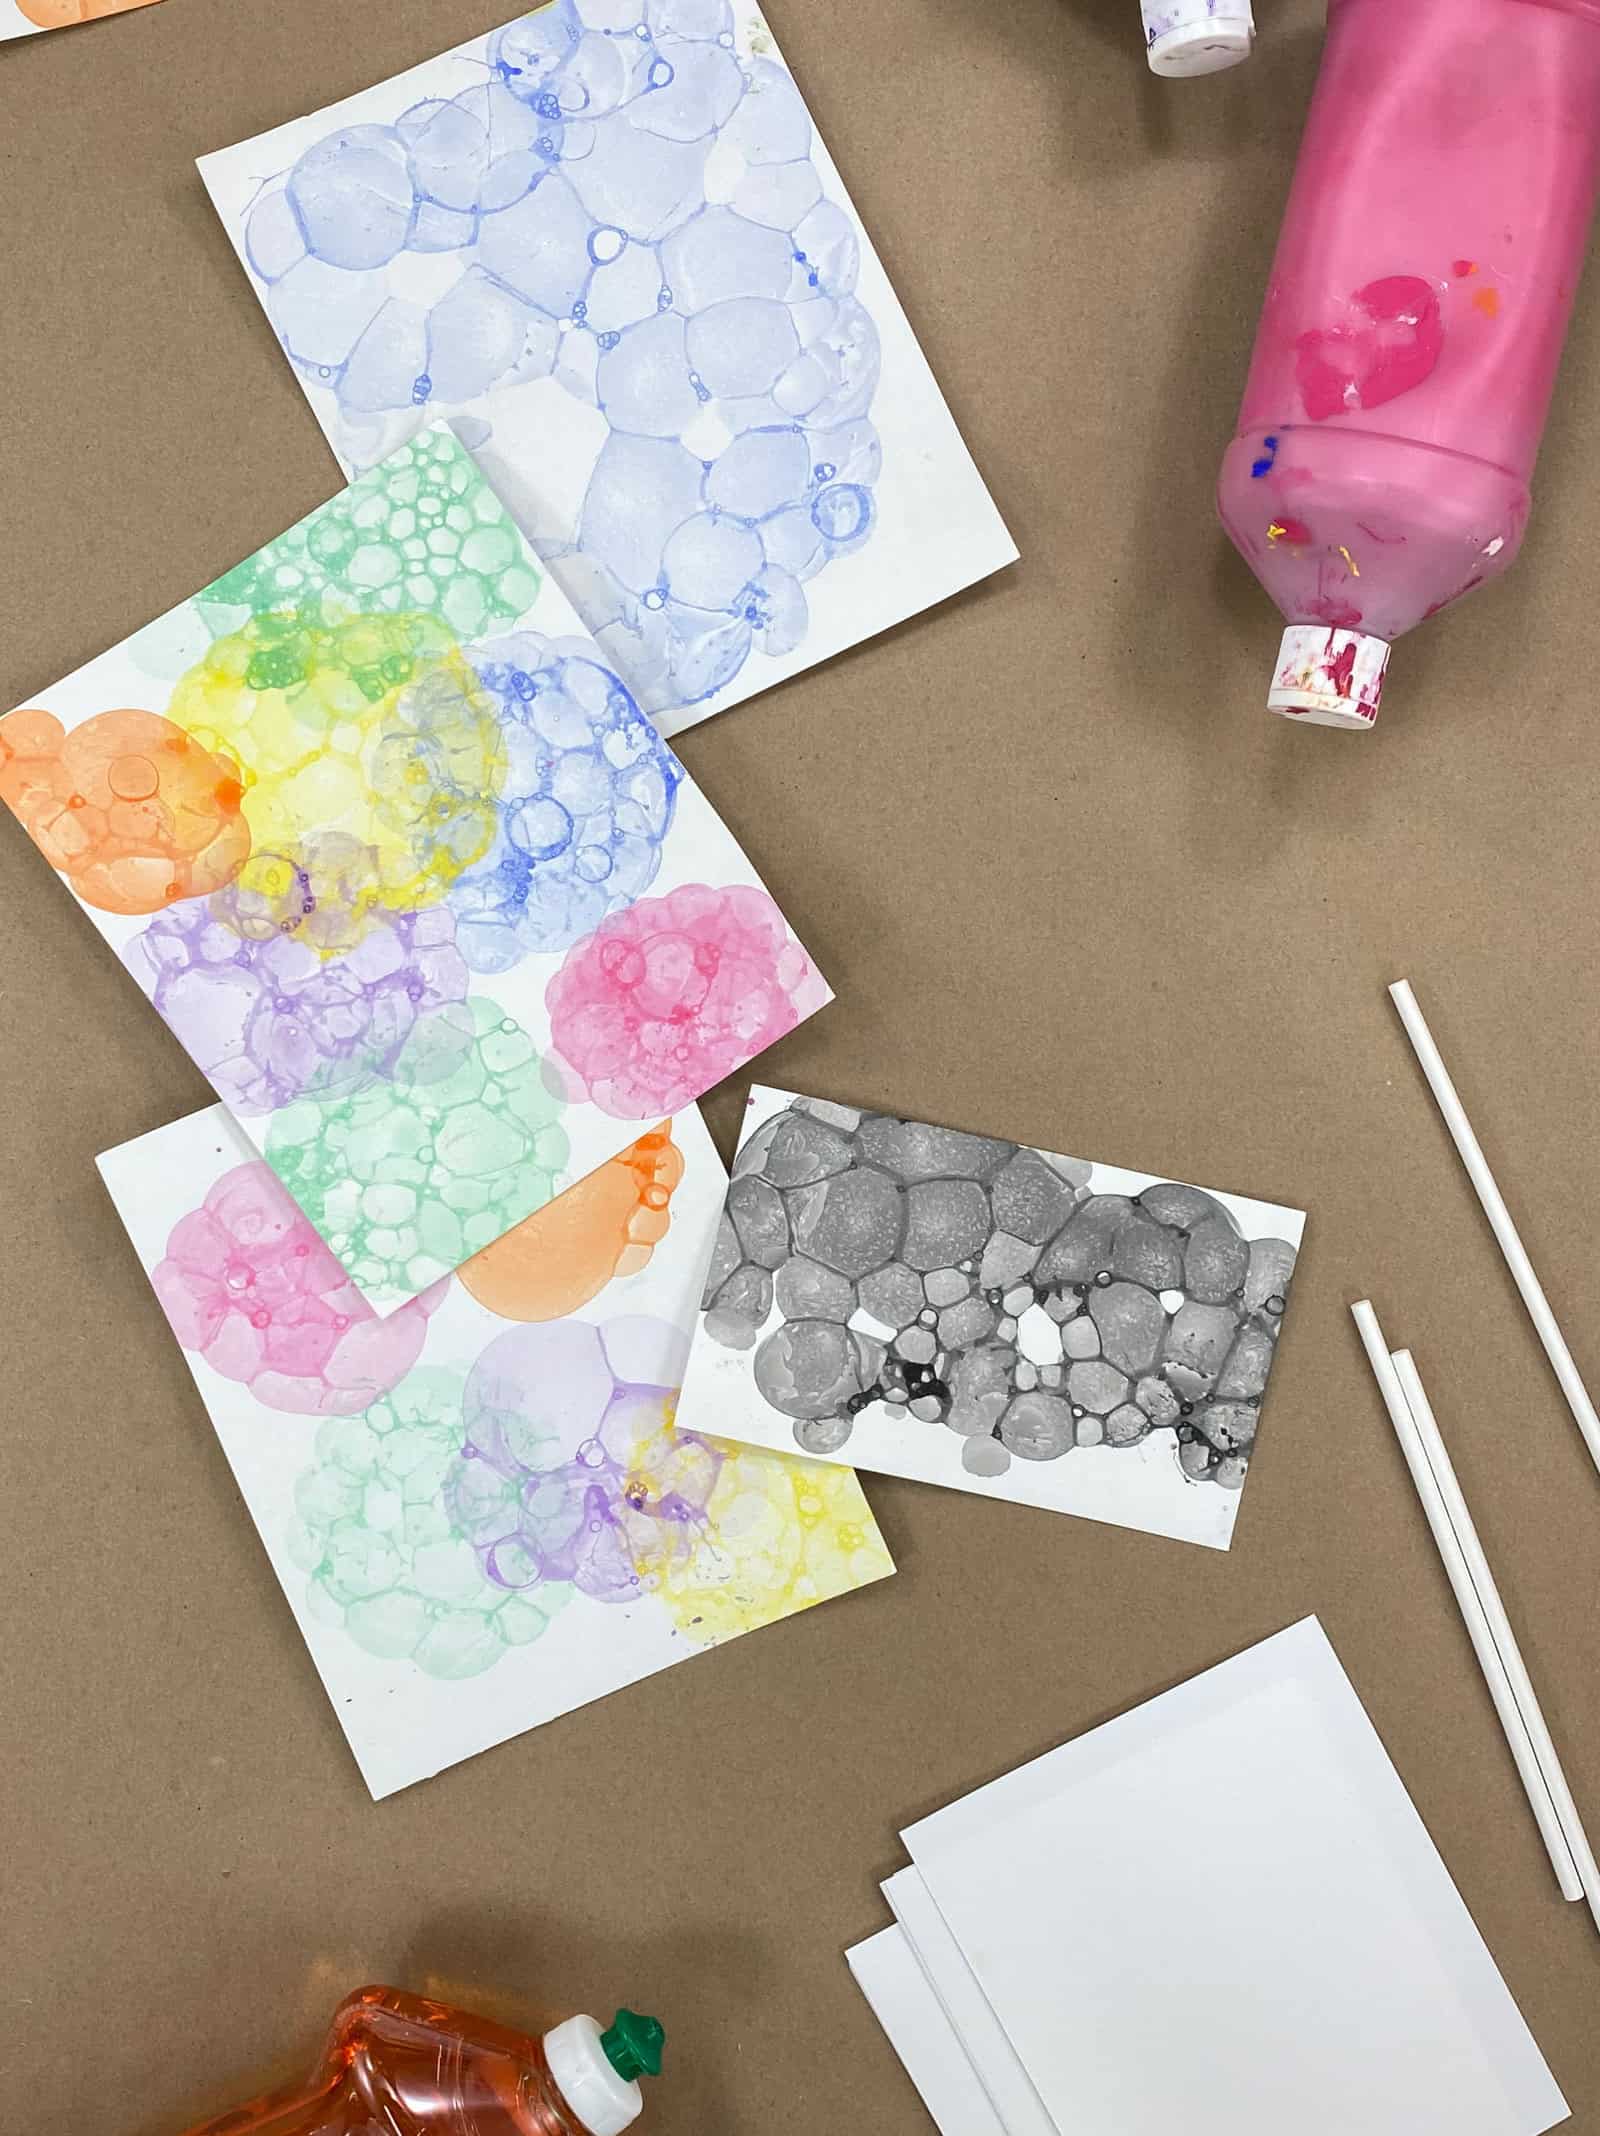
Printing with Bubbles
Ready to get messy? Okay, take a deep breath and blow yourself away with this little ・:*Printing with Bubbles*:・ technique.
Materials
+ Mixed Media Paper or Watercolor Paper
+ Tempera Paint (Water-based paint)
+ Dish Soap
+ Straws
+ Cups
Steps
1 - Stir together each paint color in a separate cup to the following ratio : 1:1 with a splash of water
2 - Using a straw, gently blow bubbles until they reach the top of the cup
3 - Once bubbles begin to mushroom over the cup edges, stop! Remove straw.
4 - Place paper over the bubbles to create an imprint
5 - Choose your next color and repeat
Tips
If there are bubbles let on your paper, don’t touch them. Let them dry out of pop on their own and you’ll get better imprints.
Follow along, add in your own twist, and tag @craftcontemporary in your creations.
Embossed Aluminum
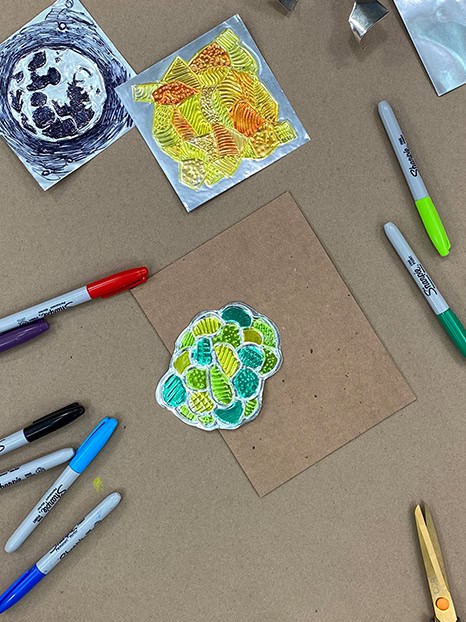
Lately we've been inspired by the milagros charms and votive offerings common in Mexico and Latin America. What better way to decorate your space than with an emblem of something important to you? Here's an easy way to create the ༄ؘ ۪۪۫۫ Embossed Aluminum ˑ༄ؘ ۪۪۫۫ version of these traditionally metal charms.
Materials
+ Embossing Foil*
+ Pencil, slightly dull
+ Sharpies
+ Scissors
Steps
1 - On a slightly soft surface, use your pencil to draw a design on the embossing foil. Be sure to press hard enough to leave a thick imprint.
2 - With the design complete on one side, turn the embossing foil over and use your pencil to highlight the outer edges of the impressions. This gives your composition more dimension.
3 - Turn the embossing foil over again, returning to the original side. Use your sharpies to add color to your composition
4 - Once your design is complete, you can use scissors to cut it into a charm, hang onto a string, or tile together with more designs!
Tips
Aluminum foil wrapped around cardboard can be substituted for embossing foil if needed.
Follow along, add in your own twist, and tag @craftcontemporary in your creations.
Printmaking with Bubblewrap
After you unpack your home deliveries, separate the bubble wrap. We got big plans for your bubble wrap...
It's ・:*Printmaking*:・ time!

Materials
+ Bubble wrap
+ Acrylic paint
+ Scissors
+ Paper
+ Brushes(foam and roller)
Steps
1 - Shake and squirt acrylic paint onto a paint tray. Even with foam roller and repeat with multiple colors
2 - Using scissors, cut bubble wrap into smaller shapes, squares, or strips.
3 - Roll paint gently onto the bubble wrap. Bubble side up.
4 - Place down on paper, press and peel to reveal your print
5 - Repeat with different colors and bubble wrap pieces. Layer your colors. Experiment!
Tips
You can easily wash your bubble wrap once you’re finished, to reuse for more prints.
Follow along, add in your own twist, and tag @craftcontemporary in your creations.
Landscape Yarn Painting
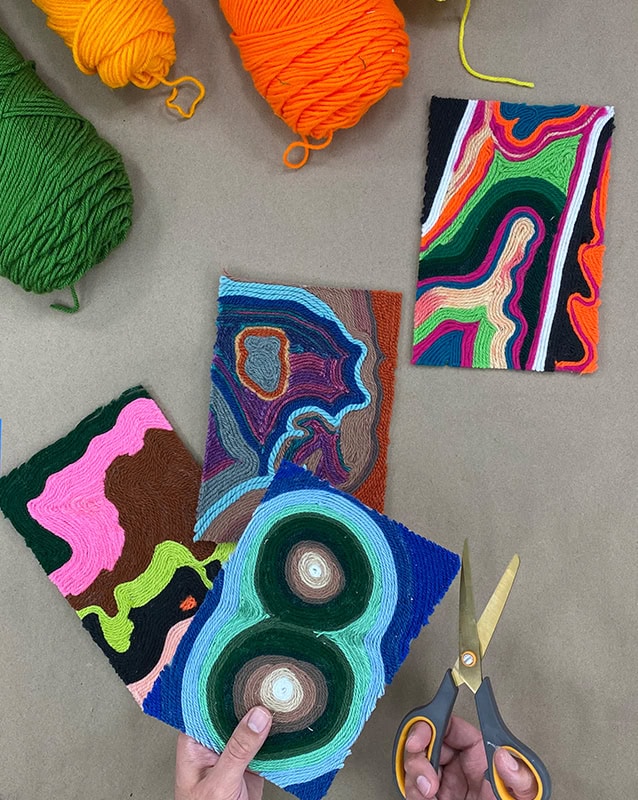
Yearning for the great outdoors? Got some extra yarn layin’ around? Try making an abstract landscape.
Look out your window, cross your eyes (not for too long!) and get going.
Materials
+ Yarn
+ Cardboard
+ Glue
+ Pencil
+ Scissors
Steps
1 - Draw out a simple design, focusing on abstract patterns and natural shapes.
2 - Apply a small amount of glue to get going.
3 - Apply yarn in strips or spirals. Experiment with multiple colors and ways of laying.
4 - Use your fingers to shape the yarn. Apply more glue when necessary.
5 - Let yarn hang over the edges of your cardboard until the design is complete.
6 - Use scissors to trim. And voila! A landscape from your mind’s eye.
Follow along, add in your own twist, and tag @craftcontemporary in your creations.
Marbled Paper
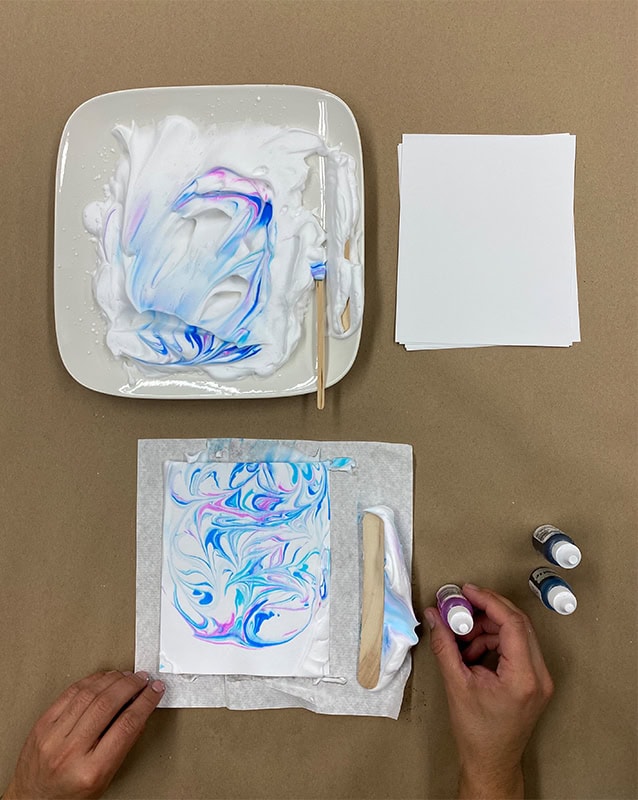
Controlled chaos, anyone? Sometimes you just need to make a little mess.
There’s always beauty on the other side when you’re making ❉ Marbled Paper ❉
Materials
+ Shaving Cream
+ Liquid Watercolors
+ Coffee Stirrer
+ Popsicle Stick (Ruler, Spatula)
+ Mixed Media Paper or Watercolor paper
Steps
1 - Shake and spray shaving cream onto a plate or pan
2 - Use spatula to level the surface of the cream
3 - Apply small dots of food coloring as desired
4 - Swirl together the colors using your coffee stirrer
5 - Lay paper down on surface of shaving creme, pressing down evenly to saturate
6 - Gently peel paper off and scrape all shaving cream with popsicle stick
7 - Reveal your design!
Follow along, add in your own twist, and tag @craftcontemporary in your creations.
Hammered Flowers
✿ Flower Pounding ✿ is our favorite activity for getting out a little (or a lot) of pent up energy. Once you've made your custom stationary, how about writing notes of love and encouragement to friends and neighbors?

Materials
+ Flowers & Leaves
+ Hammer
+ Stationary paper, watercolor paper, or cardstock
+ Cardboard or paper towels
Steps
1 - Take a walk and collect any flowers and leaves you see. Bright colors and moist leaves work best. Experiment!
2 - Trim your pickings and lay out on your paper
3 - Cover with a piece of paper or paper towel to absorb the moisture
4 - Use your hammer and move slowly with small, even taps across your canvas. Kids be mindful of fingers!
5 - Peel open your paper and carefully remove the petals to reveal your design
Follow along, add in your own twist, and tag @craftcontemporary in your creations.